

How To Tighten Wiper Pivot Nuts
Everyone has been driving in the snow and had slush and ice build up on their windshield wiper bract. Normally this is a quick easy ready by reaching out the window, grabbing the wiper and knocking the ice off against the windshield. Yet occasionally doing this can cause the wiper retaining nut to come loose and make the drivers side wiper not usable.
Office 1 of 2: Tightening the Retaining Nut
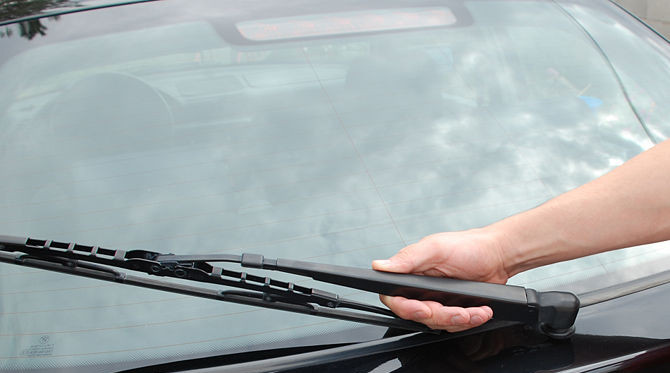
i.Turn the windshield wiper switch off and allow the blades to drib into the rest position. Turn the vehicle ignition switch off and remove the key.
Identify a safe mat, cardboard or some other slice of cloth in the work expanse and position information technology to protect the glass and paint stop in case a tool slips.
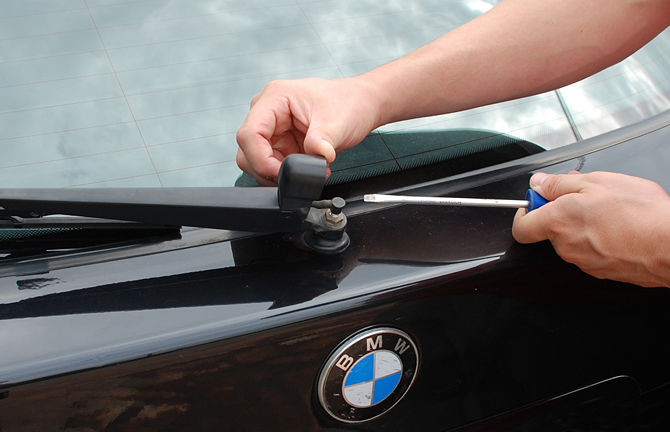
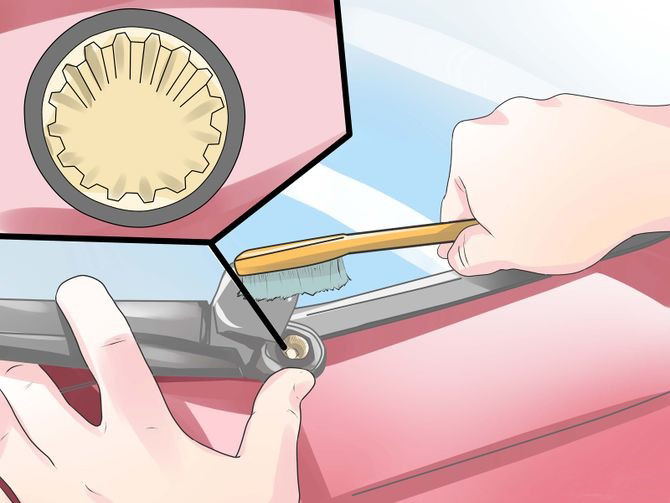
2.Pry the plastic cap open up covering the nut. Verify that the arm position is nonetheless right and using a small flat screwdriver, pry the plastic cap covering the nut at the base of the arm from the recessed nut well. The plastic cap may have a modest slot to assist in inserting the screwdriver.
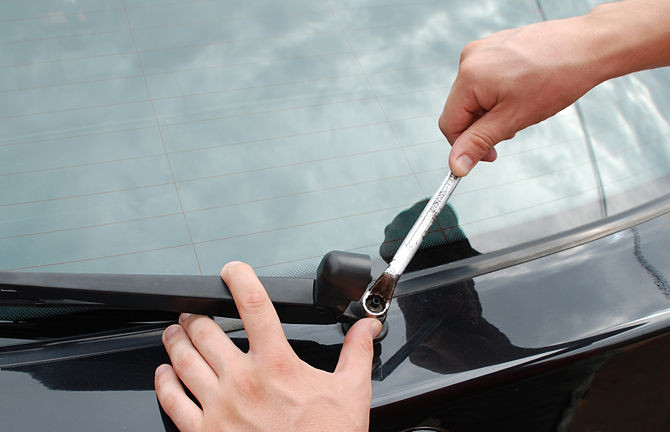
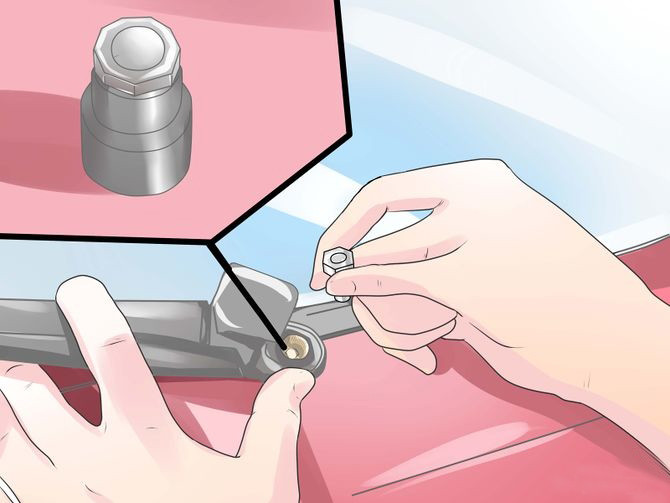
3.Tighten the nut. Once removed and having determined that the wiper arm is in the correct location on the drive shaft, select a 3/eight" drive socket that fits the nut recessed in the nut well.
Be certain that the socket is an exact fit as some are metric and some are SAE. Place the socket (and short extension if needed onto the ratchet handle and insert the socket over the nut. Gently endeavour to tighten the nut.
If the nut is already very tight, stop this process. If it turns hands, continue to tighten until it gets snug so get virtually 1/viii of a plow more to secure the nut.If the nut was already very tight, you volition need to loosen the retaining nut and remove the wiper arm for inspection. If you discover that the wiper drive shaft hole in the wiper arm has a reamed out appearance, it will be necessary to purchase a new wiper arm and install information technology.
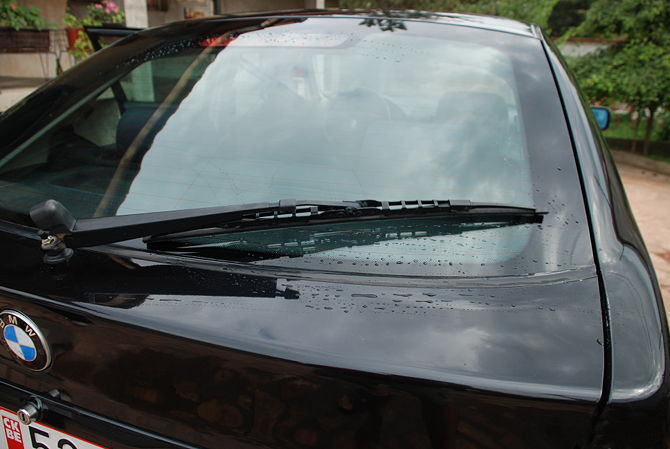
4.Test the wipers. Plow the ignition key on, turn the wipers on and test the travel of the arm for proper operation. If the arm slips, y'all volition need to supersede it.
Role two of ii: Replacing the Arm
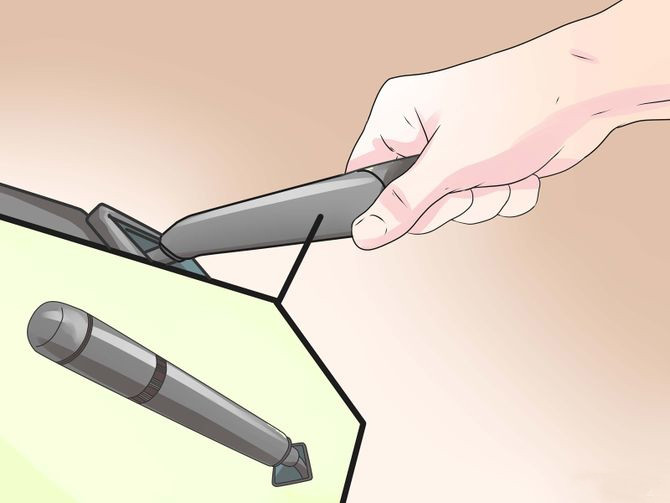
1.Clean the drive shaft splines with an one-time toothbrush and some WD-40. This will remove trapped metal and clay from the shaft splines.
Wipe the splines completely dry later on cleaning.

ii.Examine the new arm. Run into if it has matching splines that will mate with the shaft.
If it does, carefully fit the splines together matching them, being sure that the arm is positioned correctly on the windshield.
Gently tap the arm downwards onto the shaft and clean the threads for the retaining nut.
3.Install the retaining nut by mitt. Ensure that the nut turns freely and is not cross-threaded. If information technology turns easily, go along to tighten until information technology gets snug and so get well-nigh i/8 of a turn more to secure the nut.
4.Turn the ignition key on, plough the wipers on and test the travel of the arm for proper functioning.
If the wiper artillery clear each other, motion smoothly and exercise not travel into the molding at the edge of the windshield, turn off the wiper switch and ignition central.
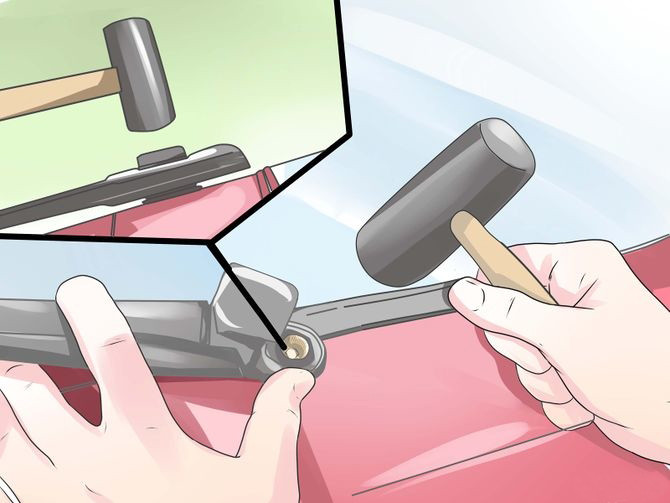
v.Using a small-scale plastic mallet or like tool, tap the plastic cap back down into the nut well, aligning any grooves or tool prying slots to their original positions.
Source: https://m.nbdntools.com/f686348/How-to-Tighten-a-Windshield-Wiper-Retaining-Nut.htm
0 Response to "How To Tighten Wiper Pivot Nuts"
Post a Comment